Foreword
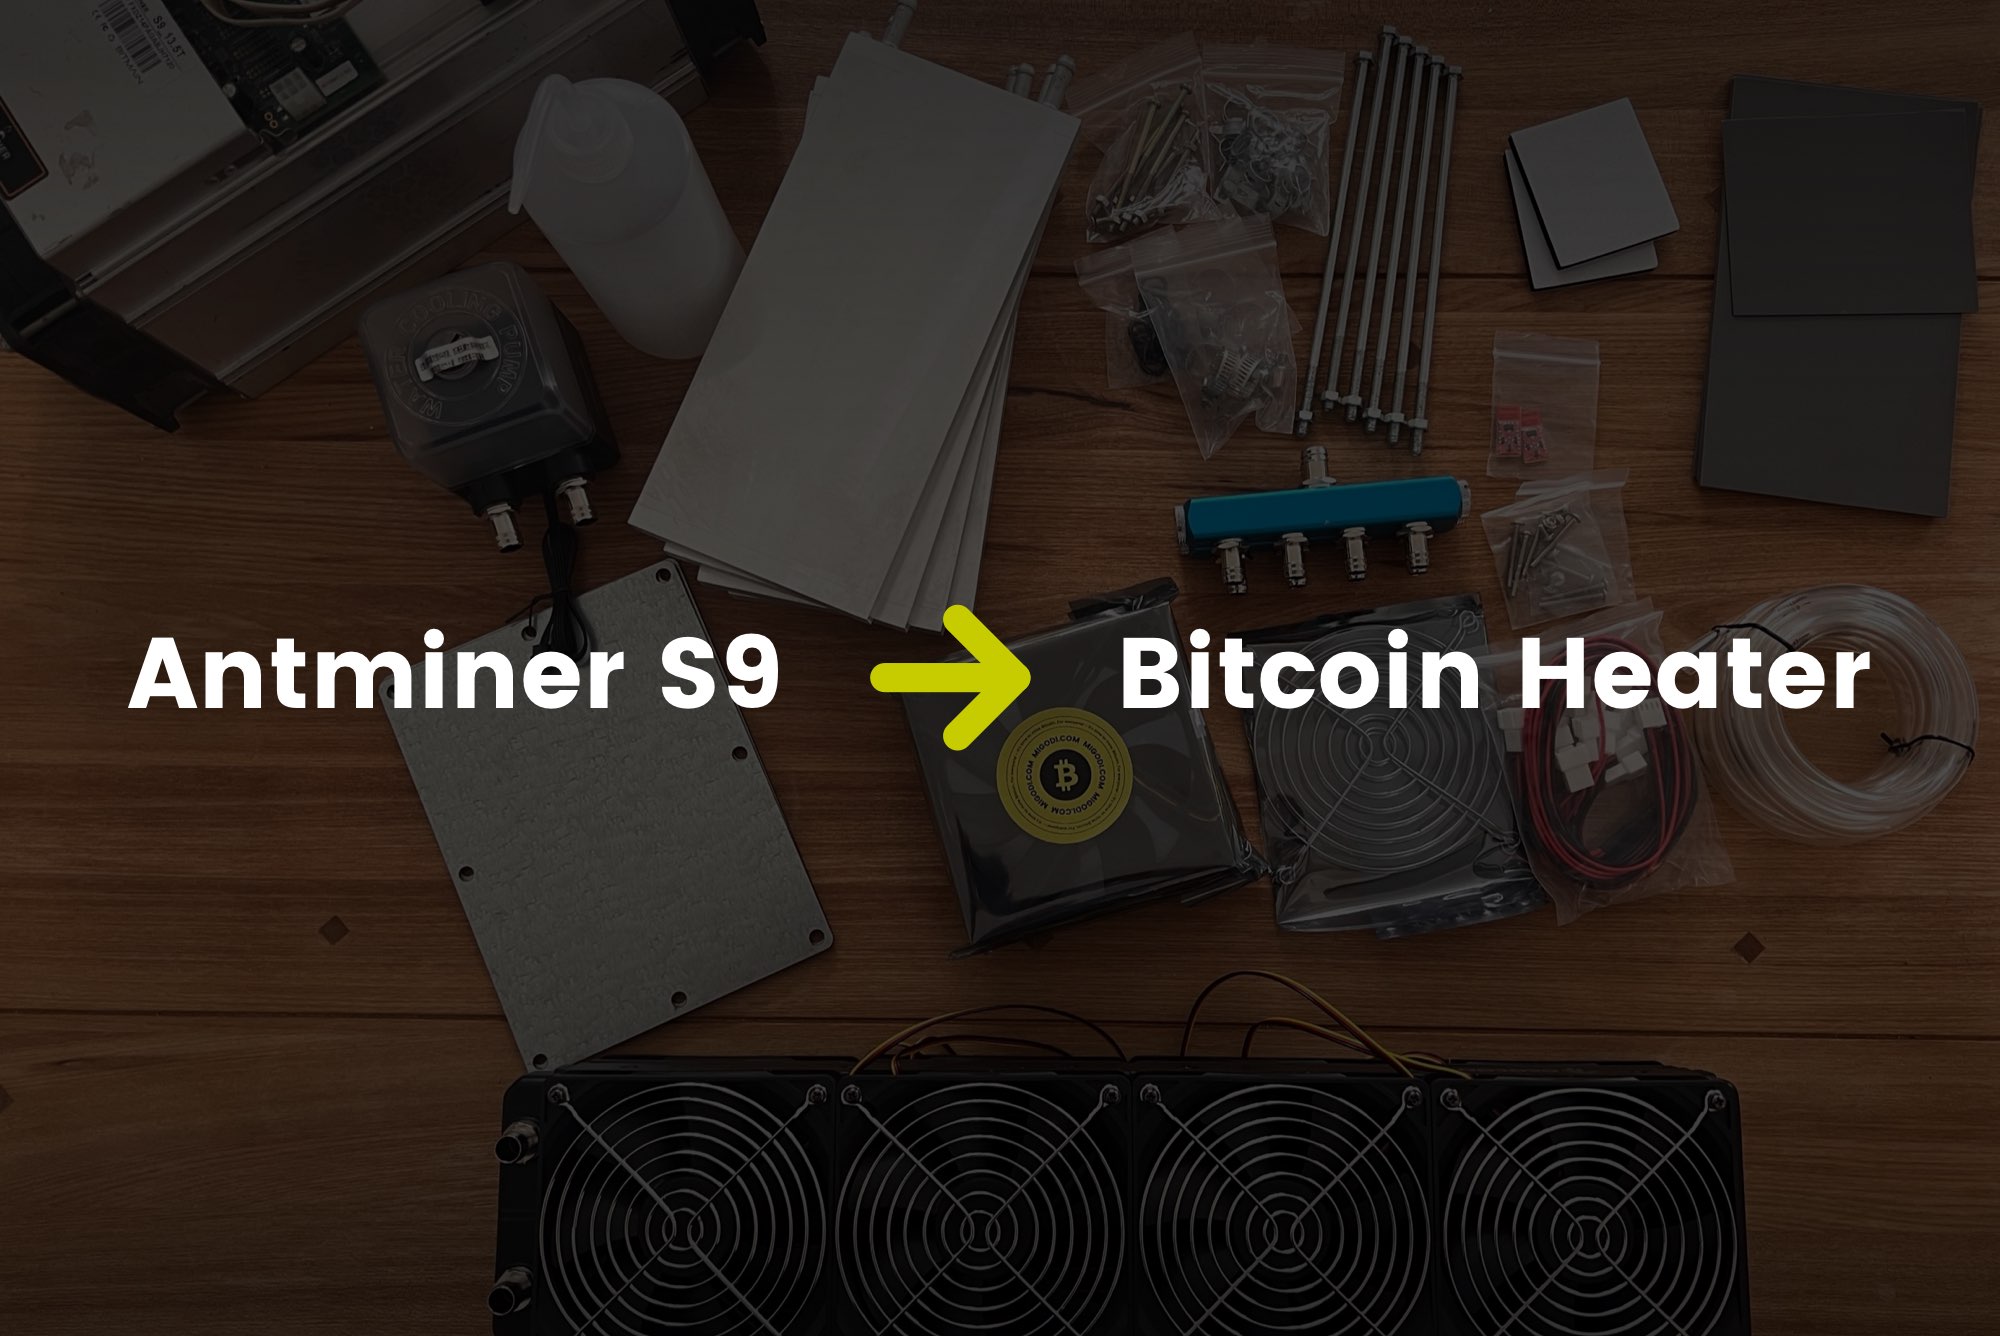
The idea behind a heater based on waste heat from computer technology is probably as old as the computer itself. In this tutorial we will convert a Bitmain Antminer S9 (ASIC Miner) into a silent air heater.
MIGODI GitHub Repo
We have also published this tutorial as a GitHub repo on GitHub.com.
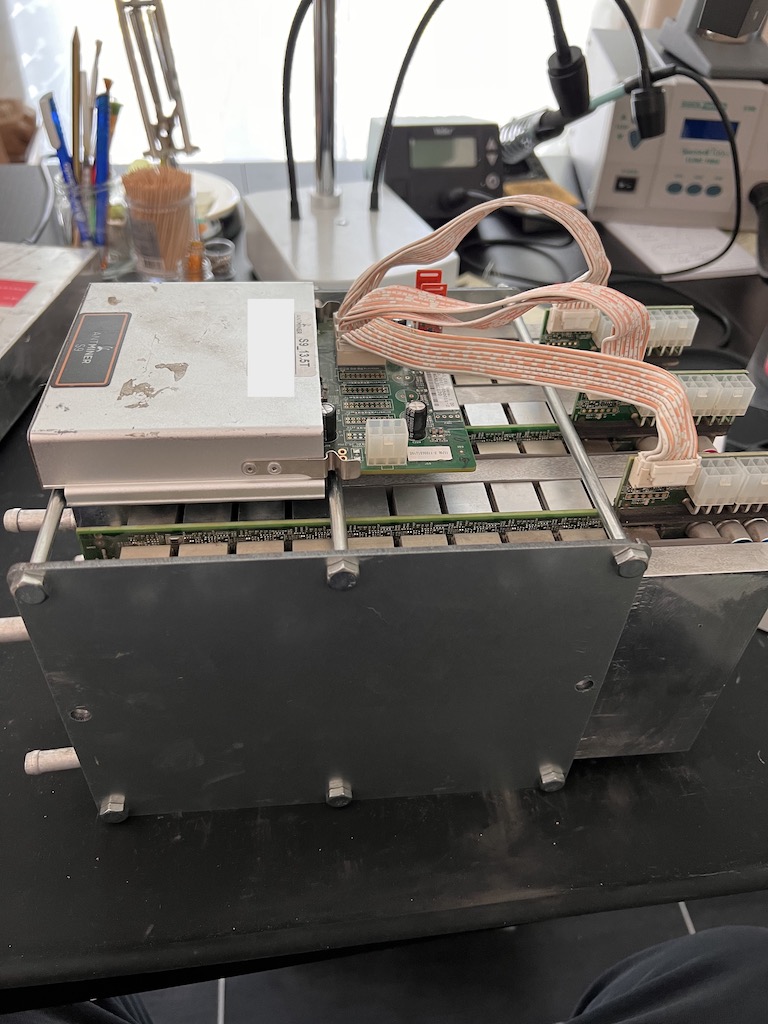
How it will look like in the end
Technical key data
- Consumption: 180-1600 watts – PSU / power supply details: HERE
- Hash power: 14 TH/s
- Waste heat: approx. 40°C
- Internet: ETH port
Basic requirement
- Alternating current from 180 watts at 220-240 volts
- Matching power supply. Alternatively, the hashboards and the control board can be supplied directly via DC, e.g. B. with a standard PC power supply or DC stabilized power supply.
- Internet (3G, 4G, 5G, SAT) and a free ETH network port. Must be stable – not fast. Usage around 300-500 MB per month.
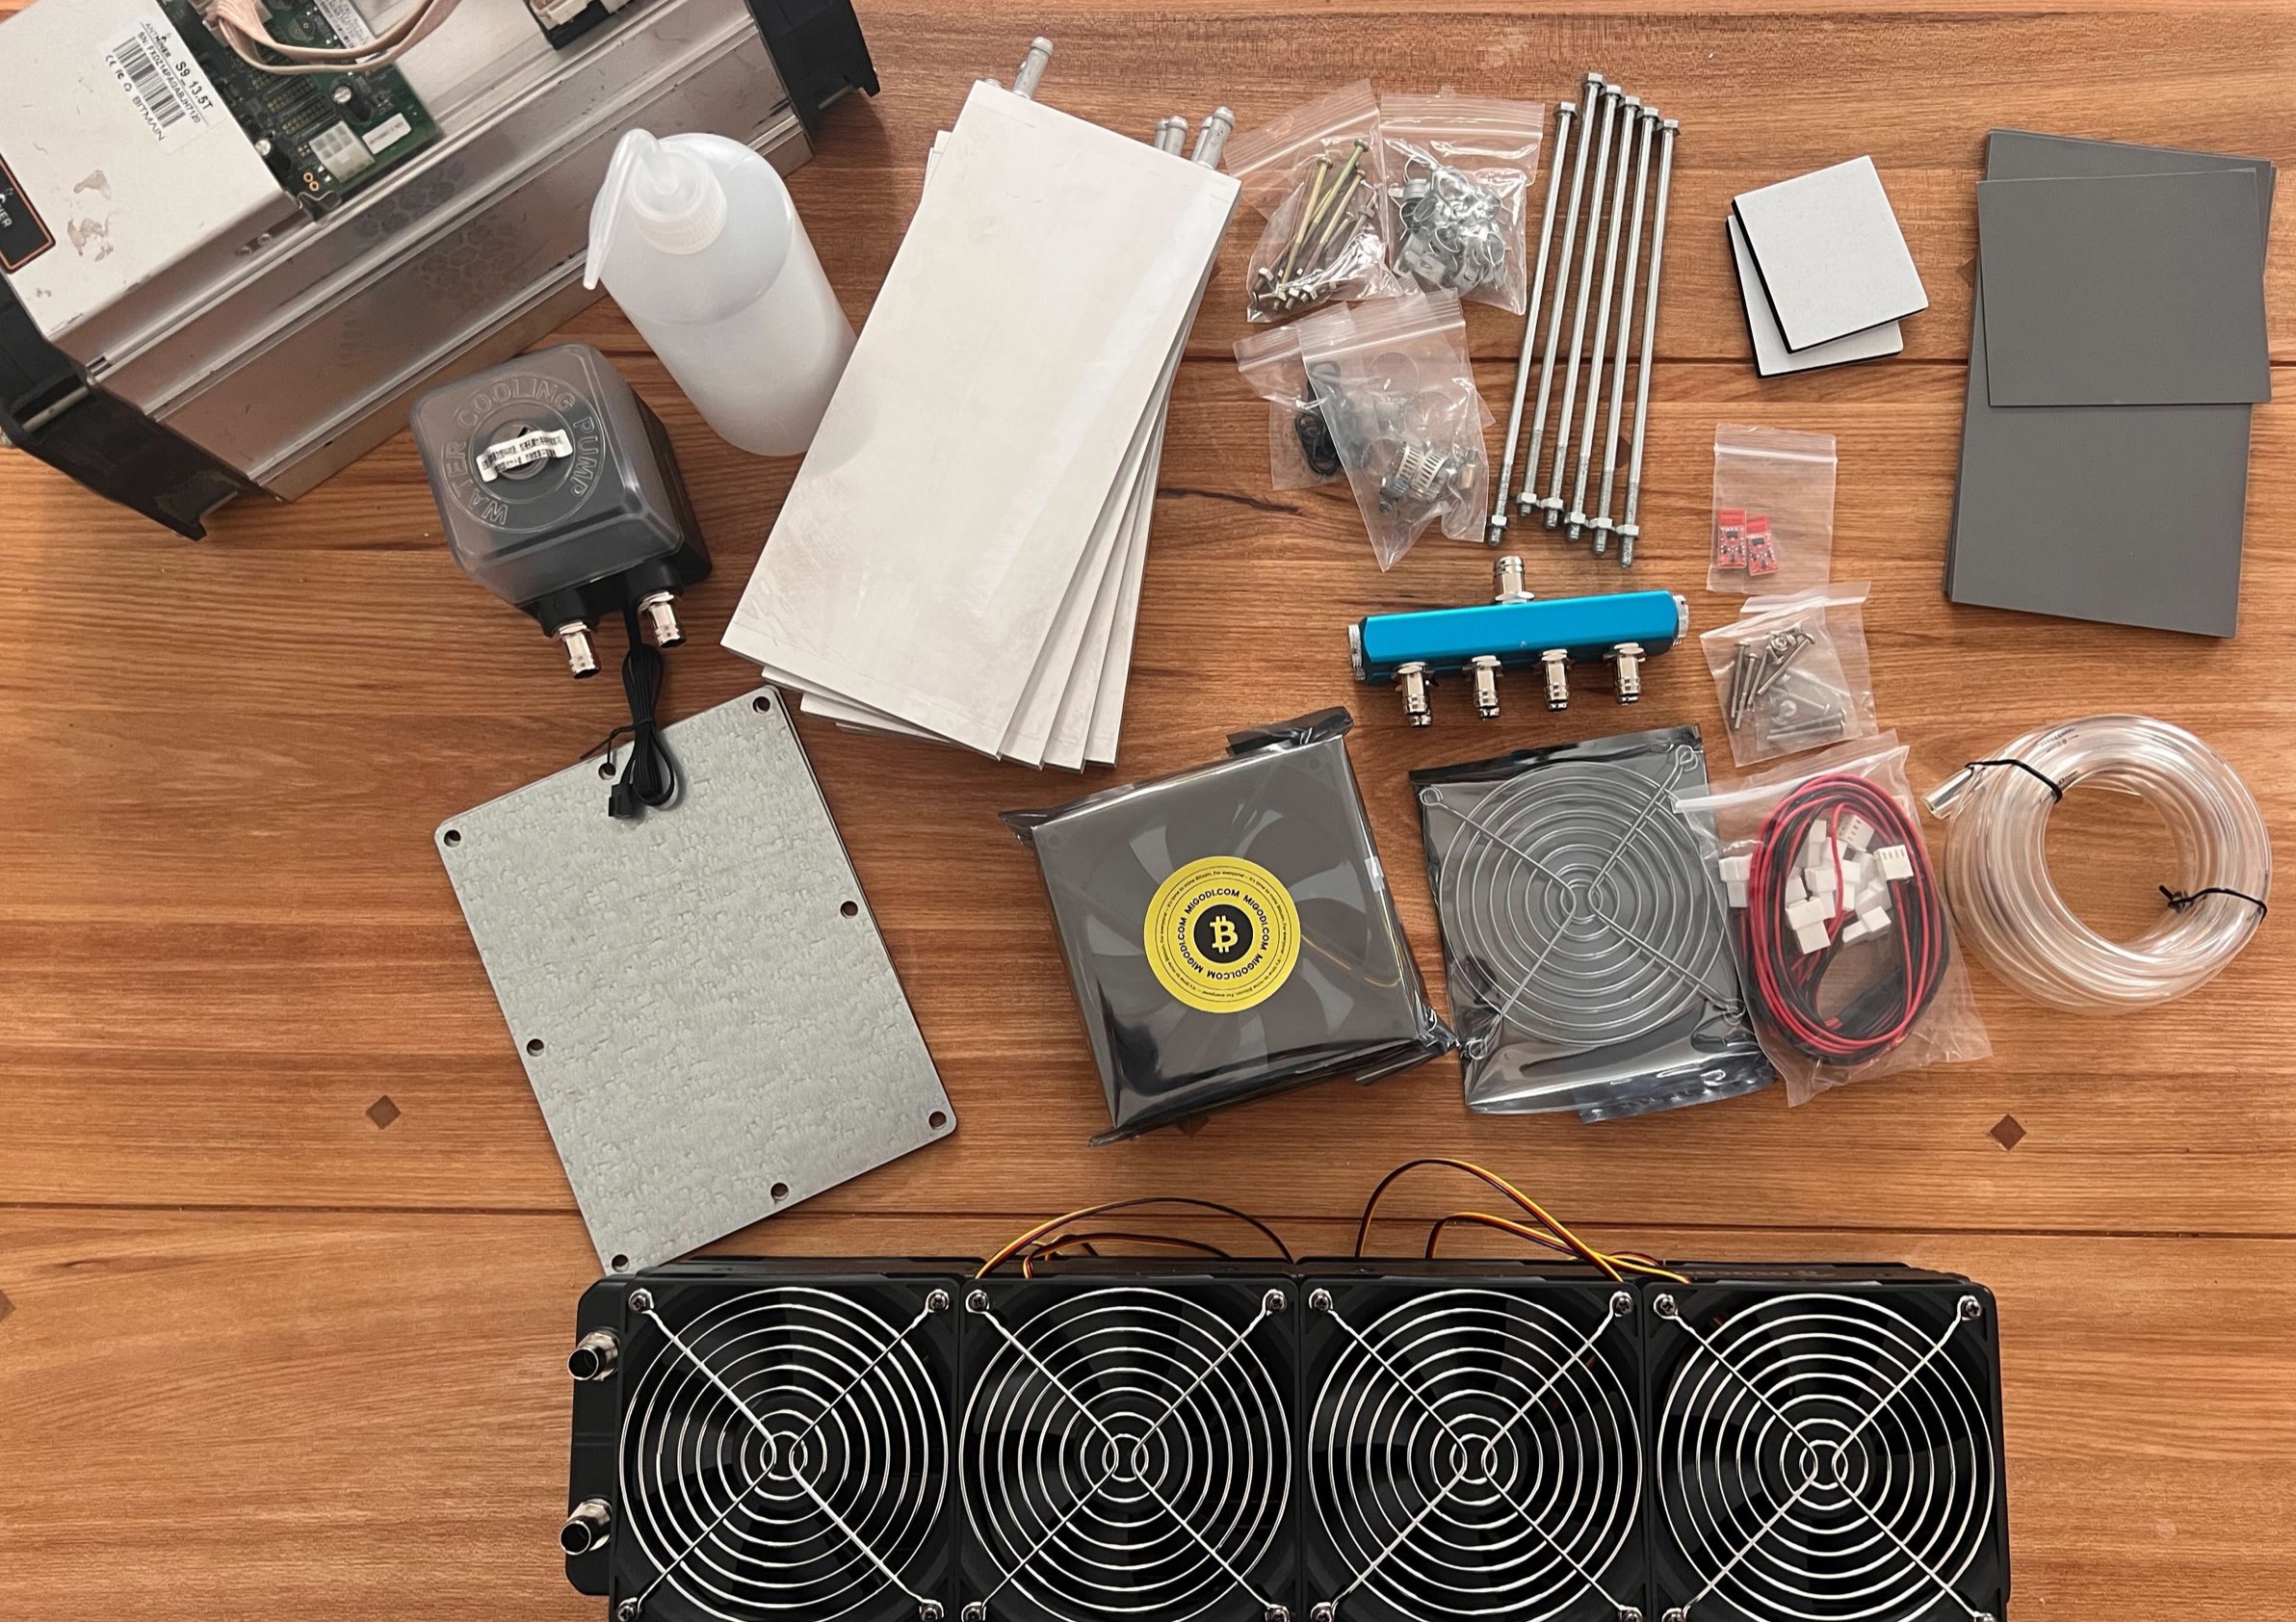
Components and tools required
- An Antminer S7 S9 S9i M3 V9 D3 A3 or T9+ with working power supply
- 2 x steel plates
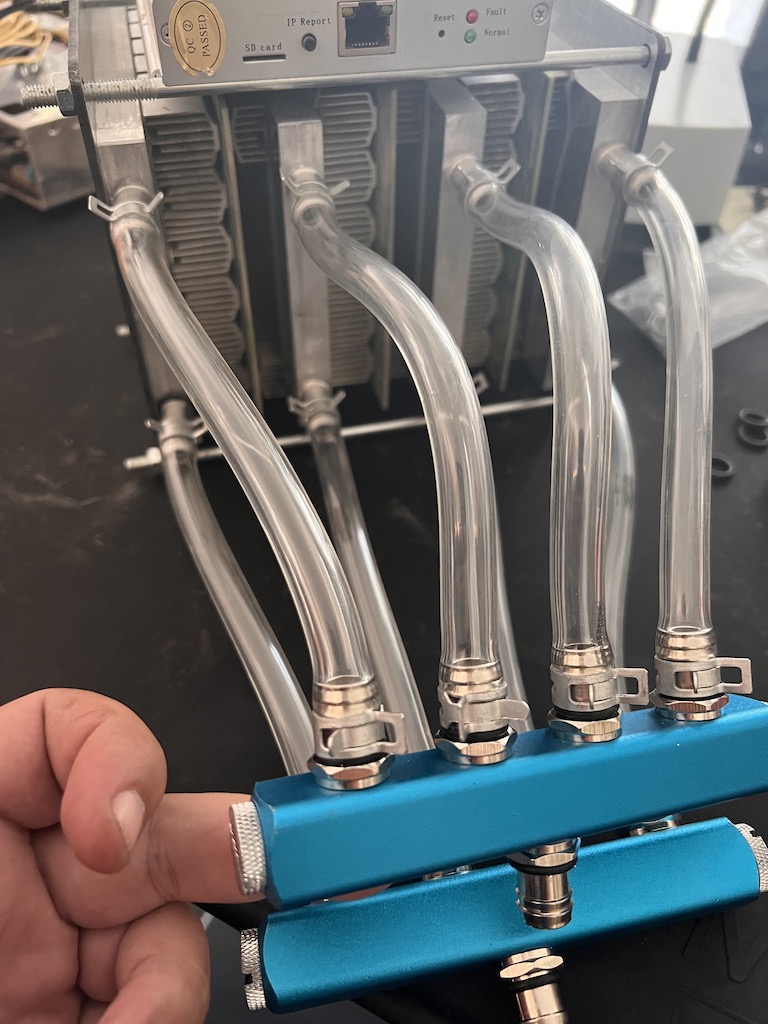
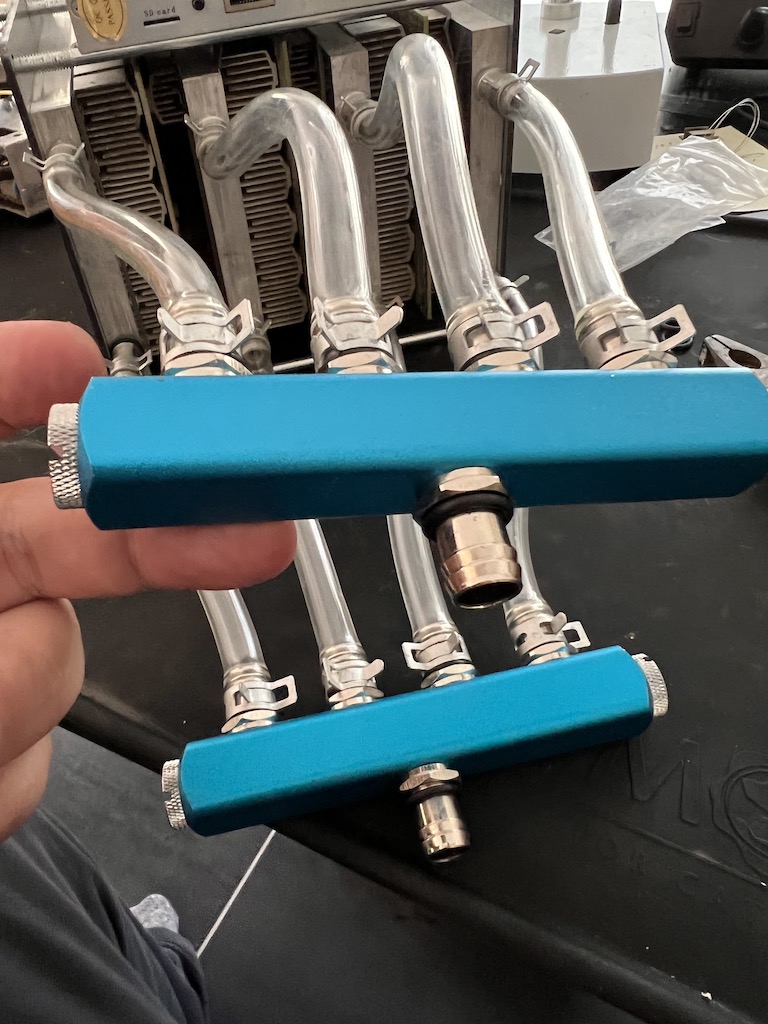
- 4 x Water Cooling Block
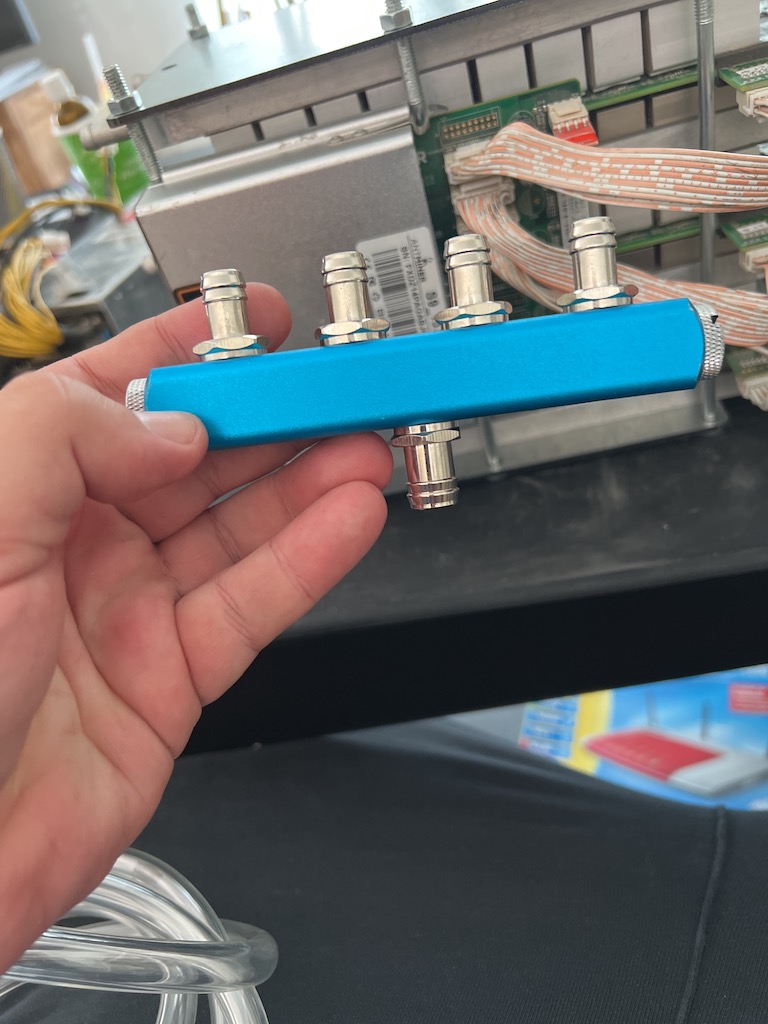
- 2 x Water Distributor (1 to 4)
- 6 x Thermo Pads
- 25 x Clips
- 1 x Water Pump
- 1 x Radiator 480
- 8 x Fans
- 8 x Fan Cover
- 2 Set Fan PWD extension cables
- 6 x long screws
- 1 x Teflon tape (small?!)
- 5L High Performance Dielectric Heat Transfer Fluid or 5L Distilled Water
- Thermo hose: 5 meters
- Odds and ends
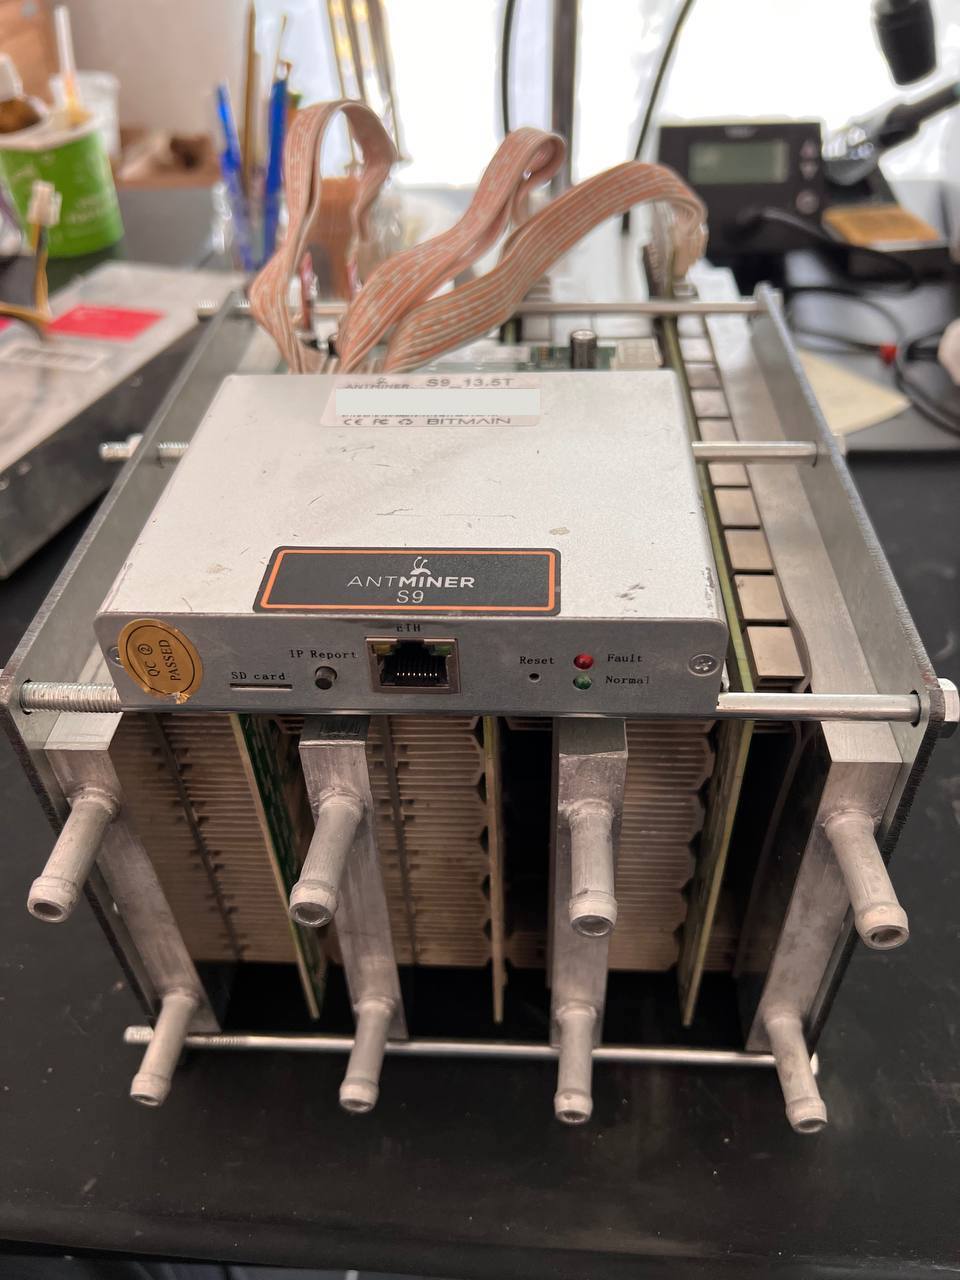
Step 1 – Check miner
Check the miner for functionality and which hashboards are running. The system already works with a working hashboard.
Step 2 – Expand Hashboards
- Ground yourself against static electricity. Otherwise you could accidentally damage the miner.
- Unscrew and remove rear fan. It is enough to unscrew the cover / holder directly.
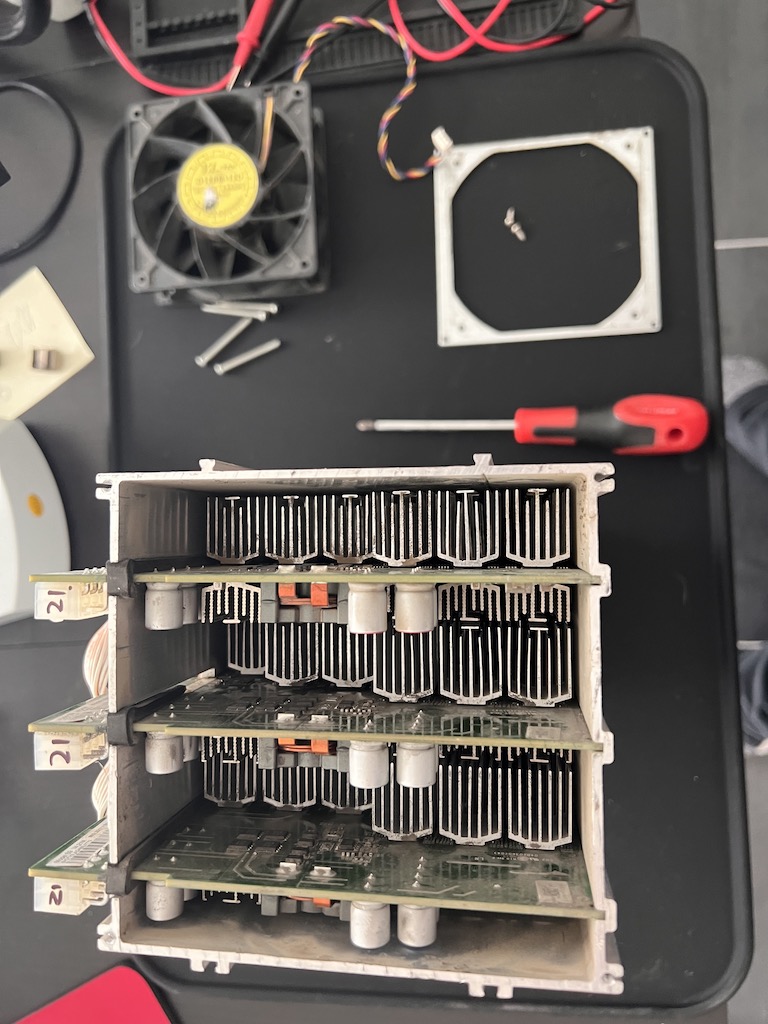
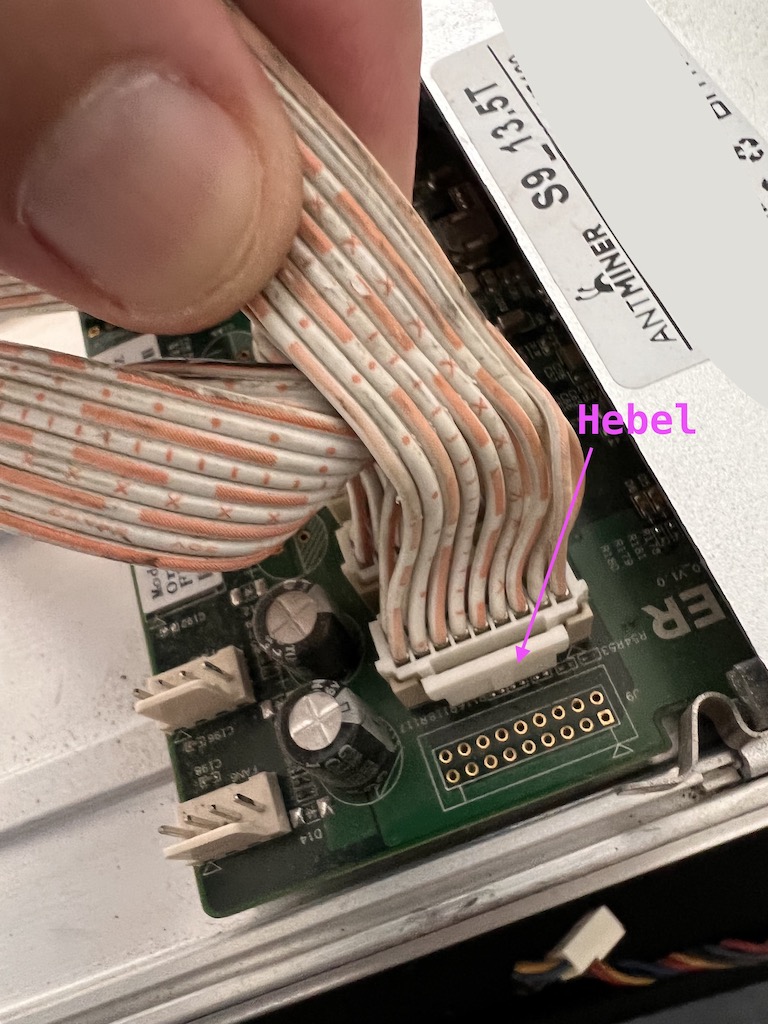
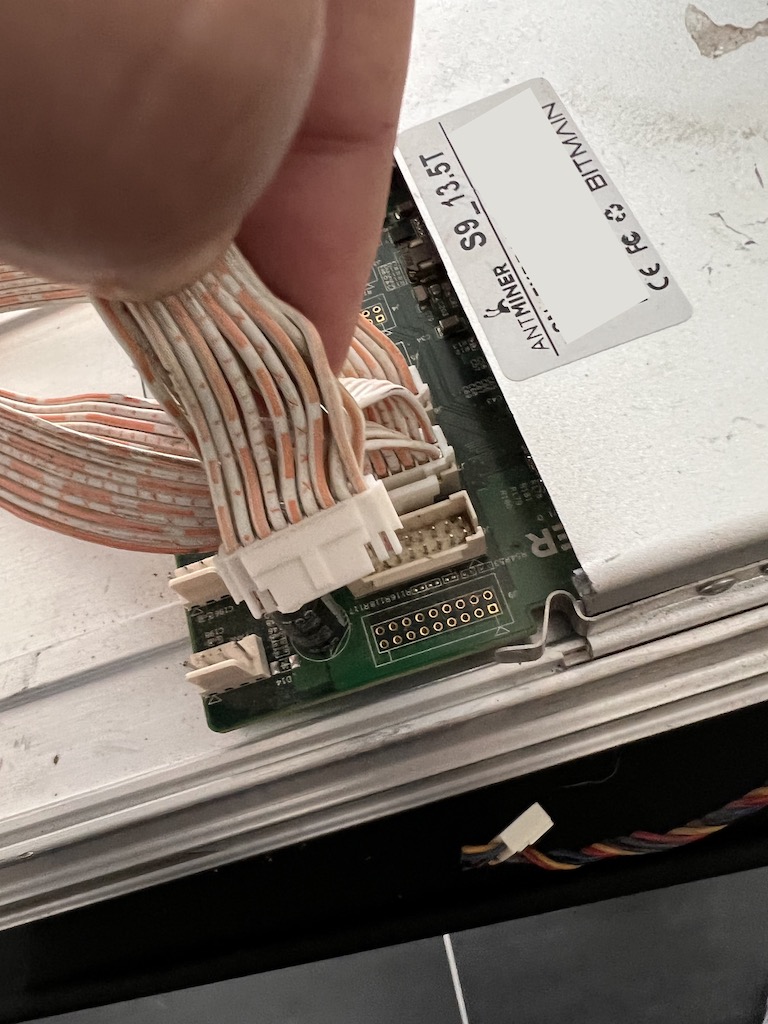
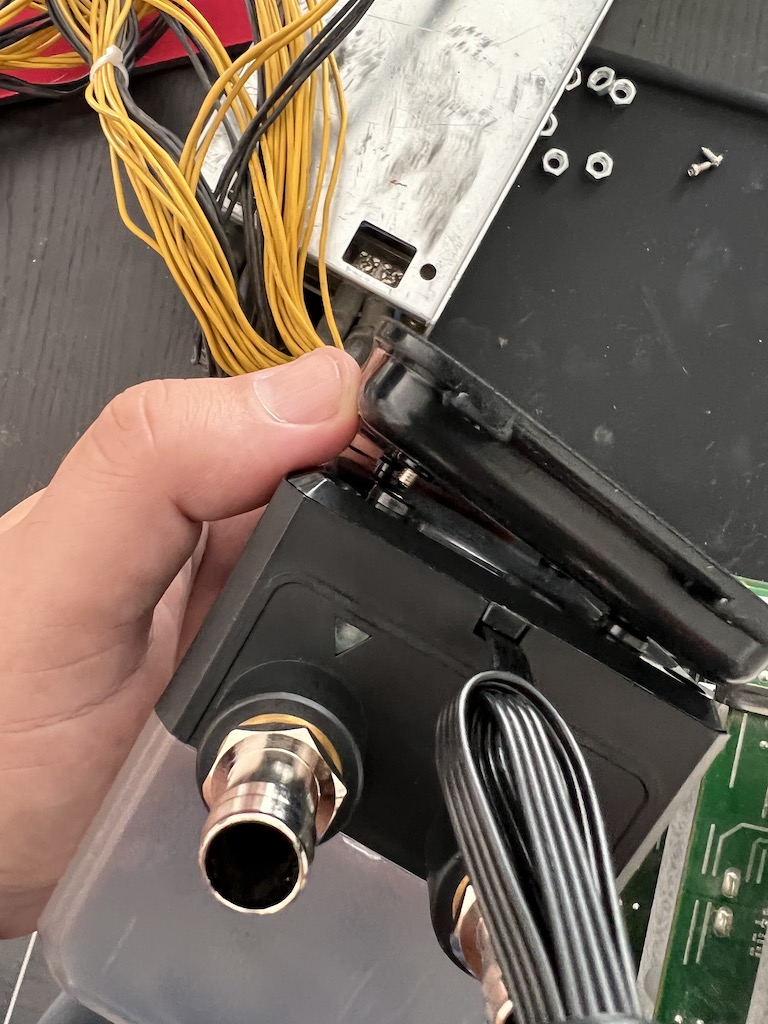
- Disconnect power supply, data and fan cables. Make sure that all cables are usually secured with a lever lock. Use your thumbs or a screwdriver to lift up on the latch to release it, then pull the cable out.
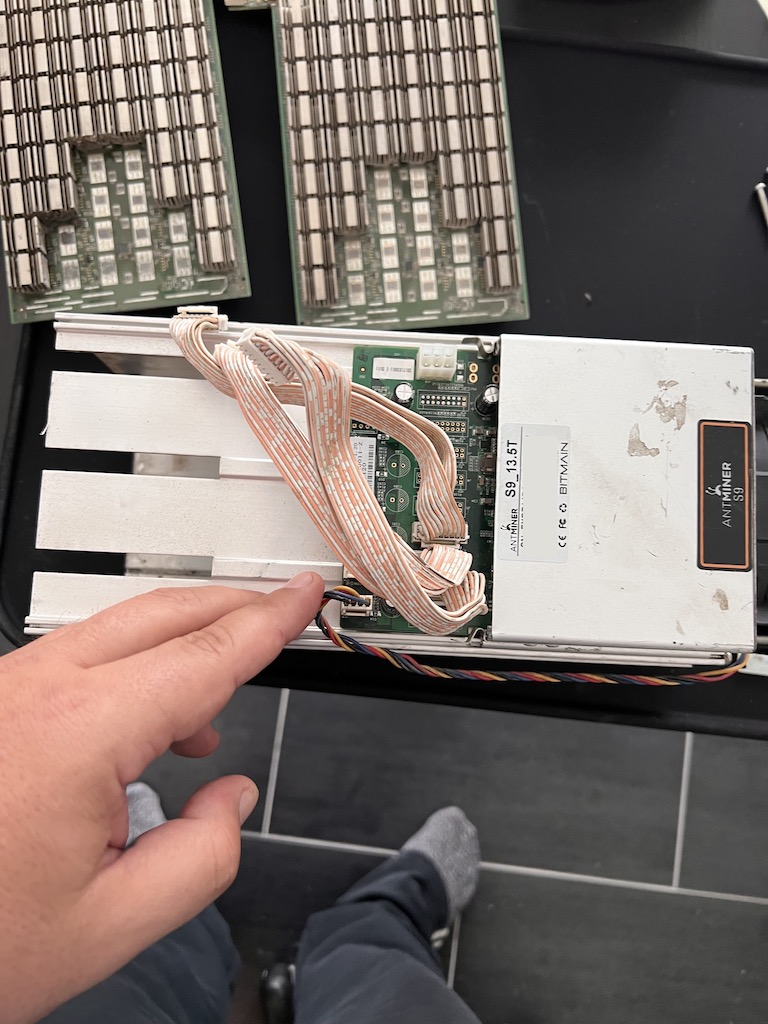
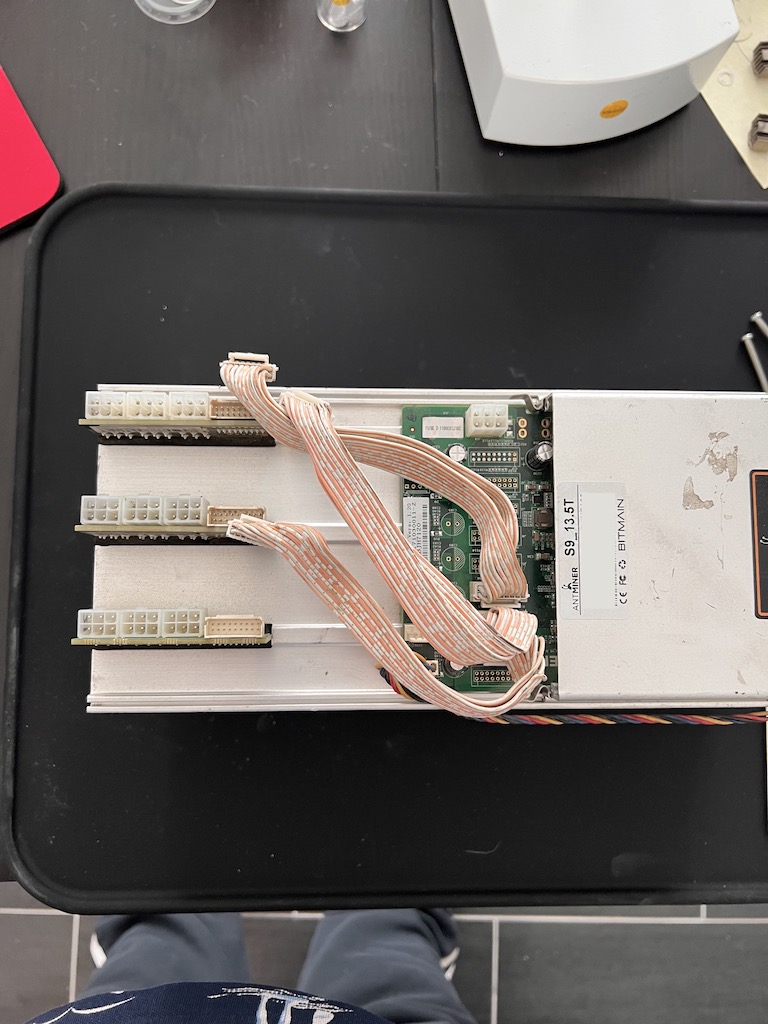
- Remove hashboards by pulling them out. Be careful, basically the hashboards can be easily pulled out. In case of resistance – look in, otherwise take out another hashboard first. Put the boards aside.
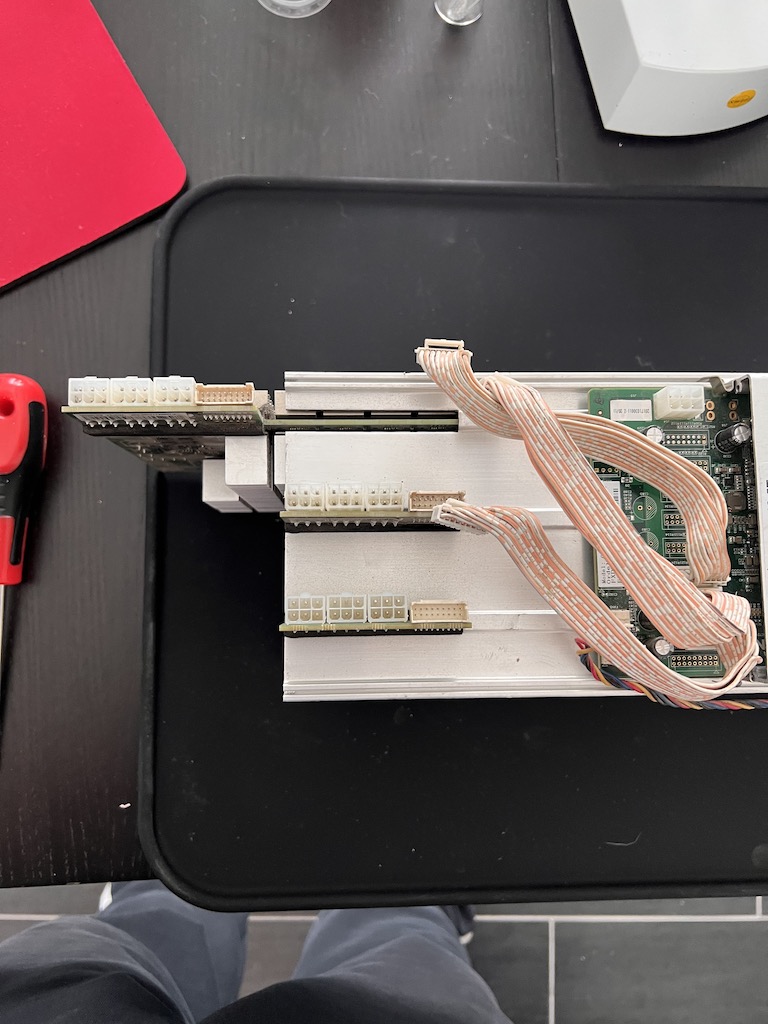
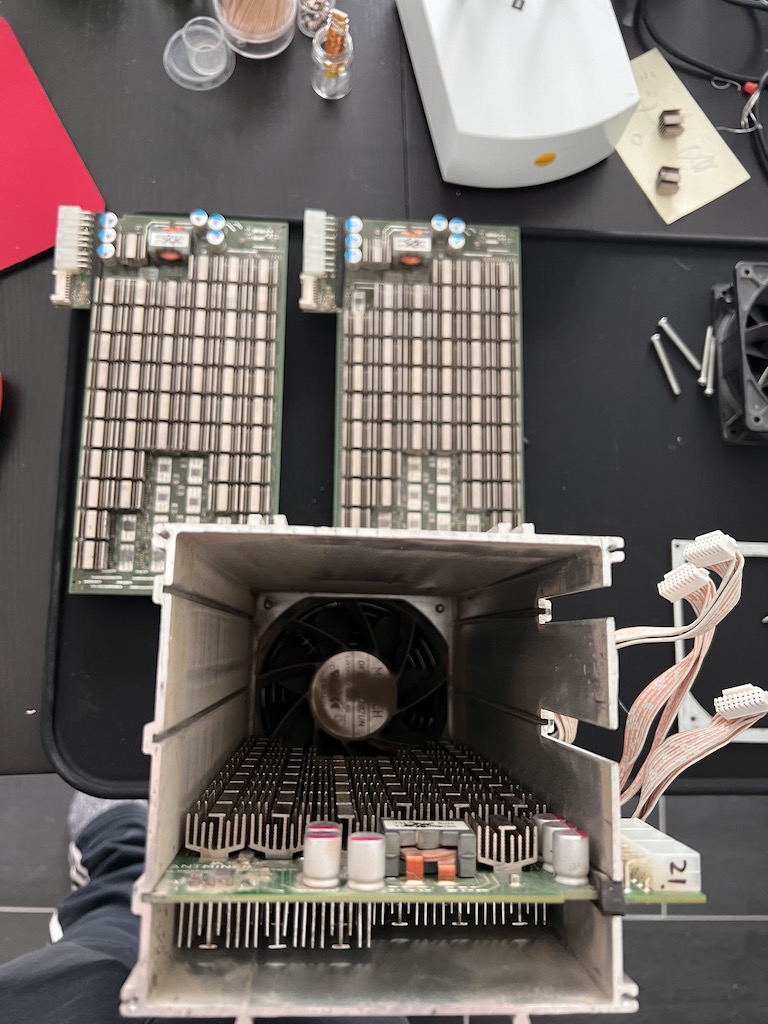
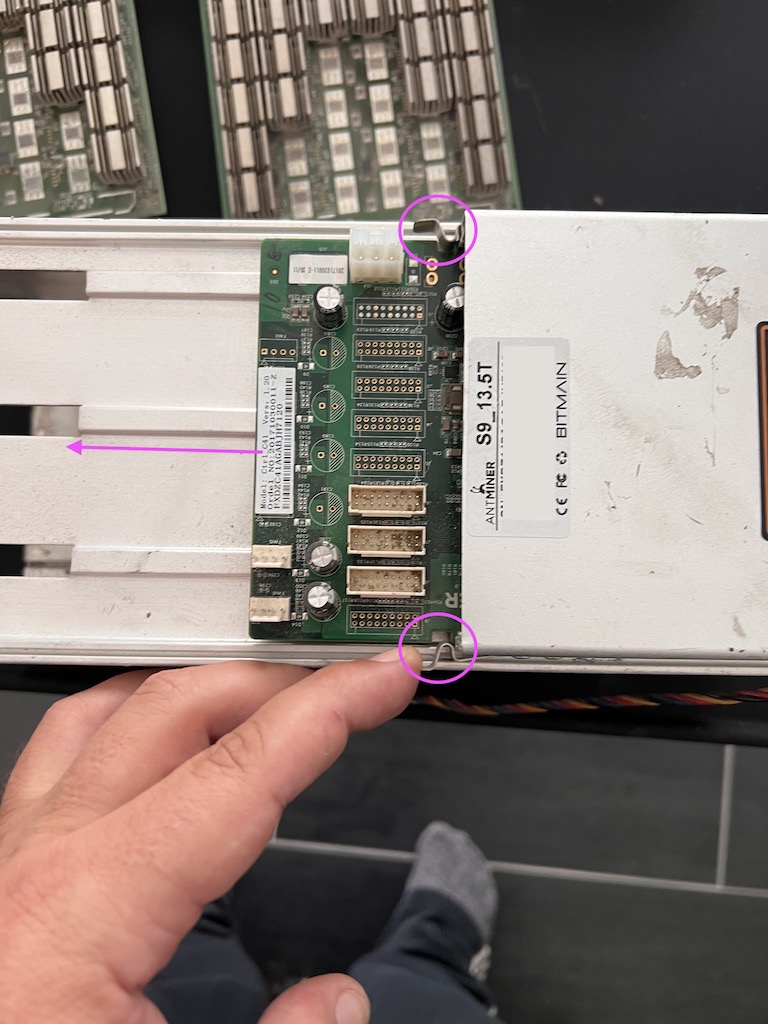
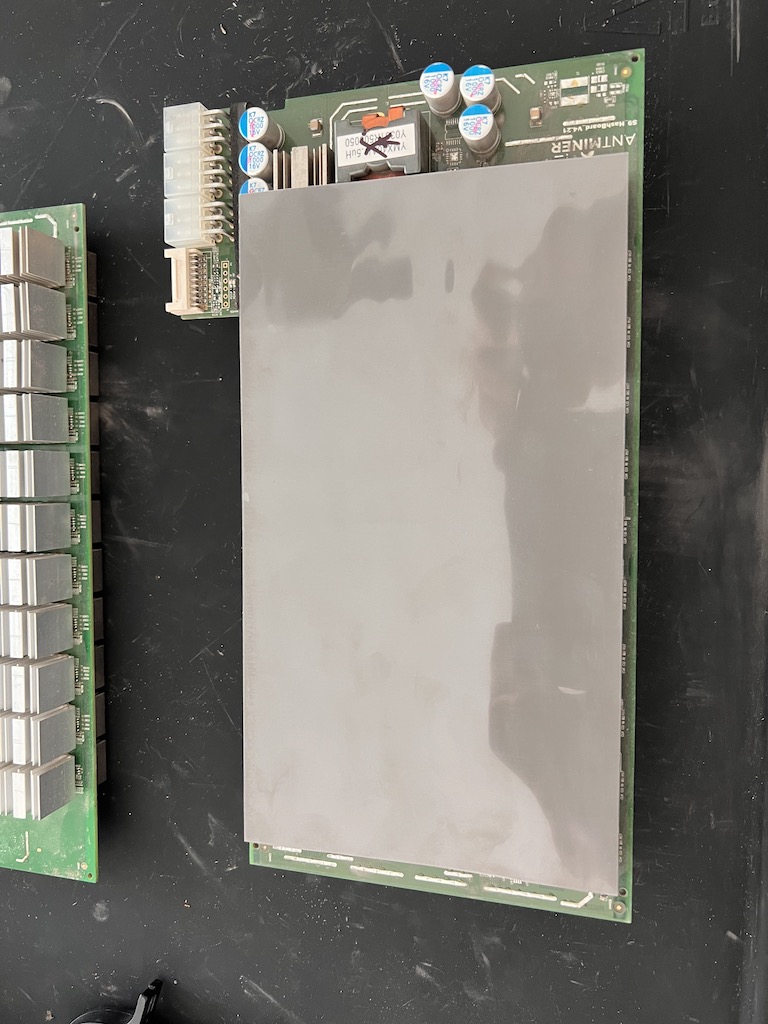
- Finally, pull out the control board. Also pay attention to the fasteners here, push them to the side and carefully pull out the control board.
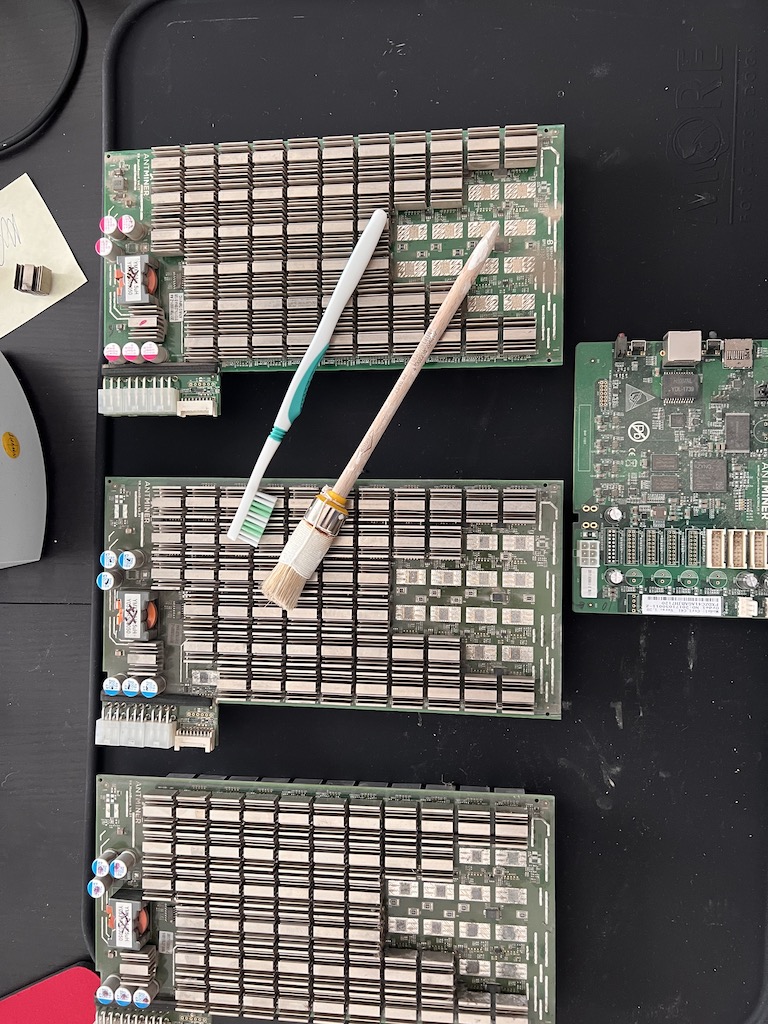
- Clean the hashboards and the control board carefully and remove dust and dirt. You can use compressed air, soft brushes, pure alcohol or dish soap. Treatment in an ultrasonic bath is also conceivable and common practice. All cleaned parts must dry completely.
Step 3 – Assemble Heater
First, let’s bring the hashboards and cooling water blocks together.
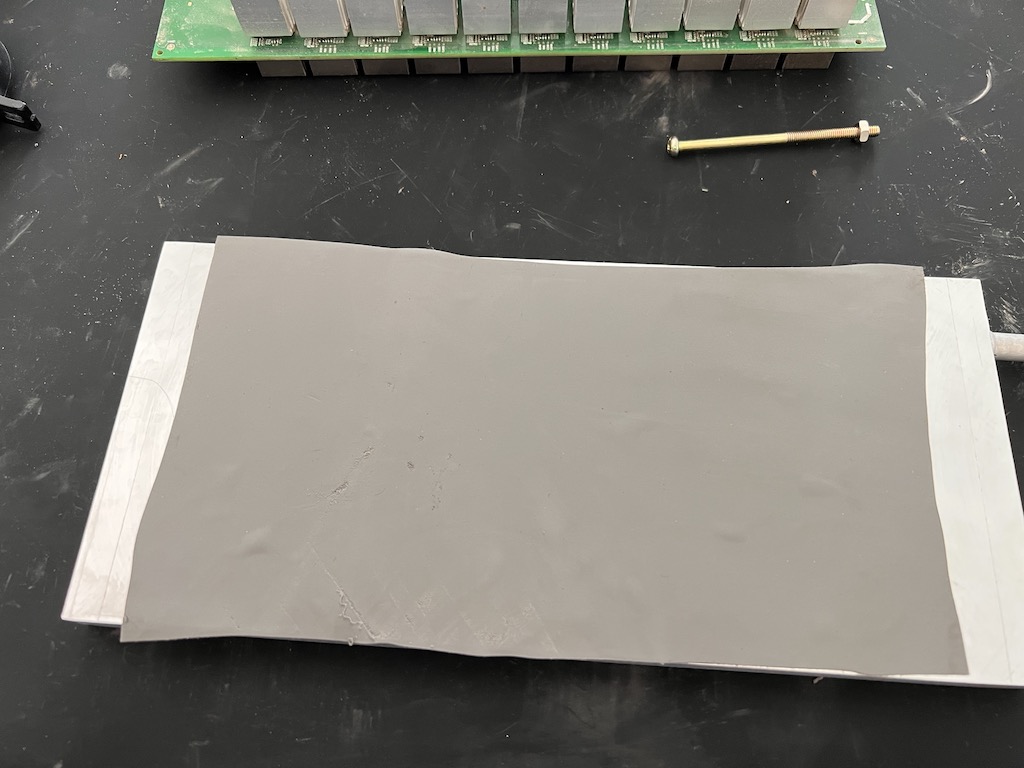
- Start with a cooling water block and lay out a thermal pad.
- Then comes the first hashboard, then another thermal pad.
- Then the next cooling water block, another pad, etc.
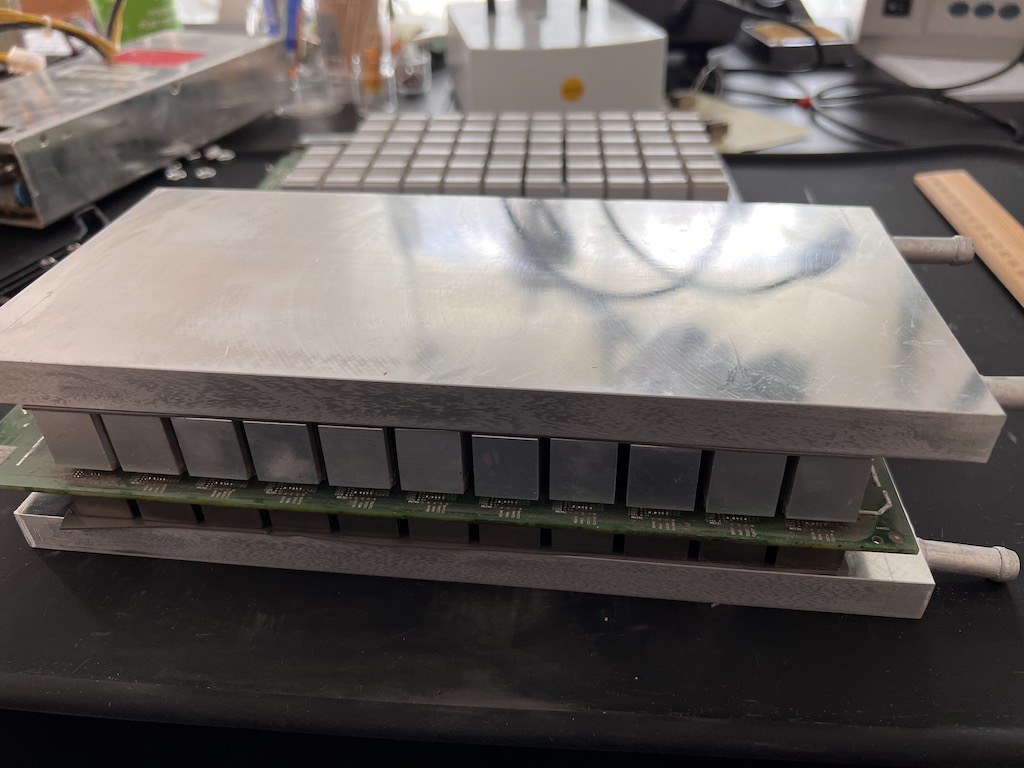
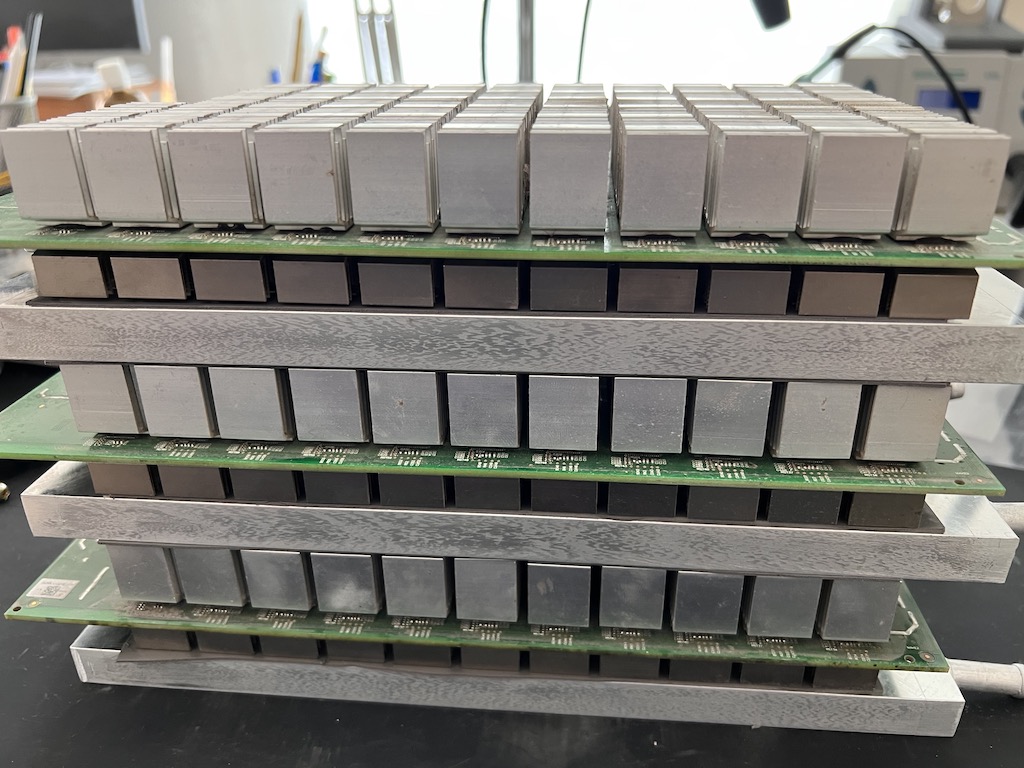
- The conclusion is a cooling water block.
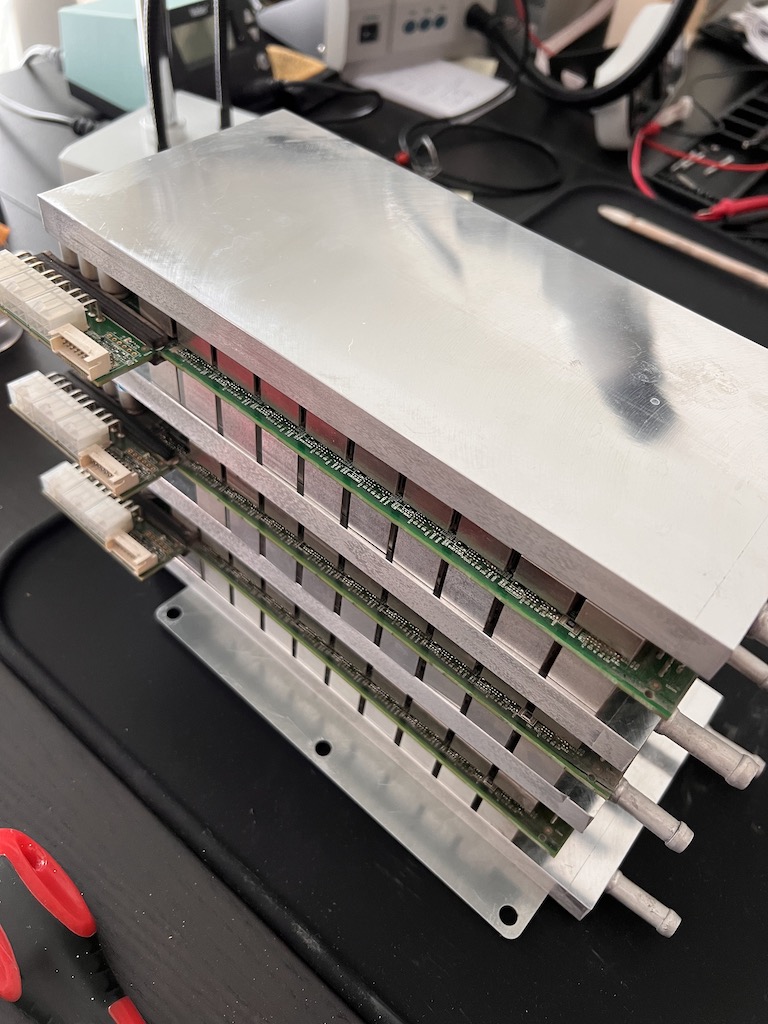
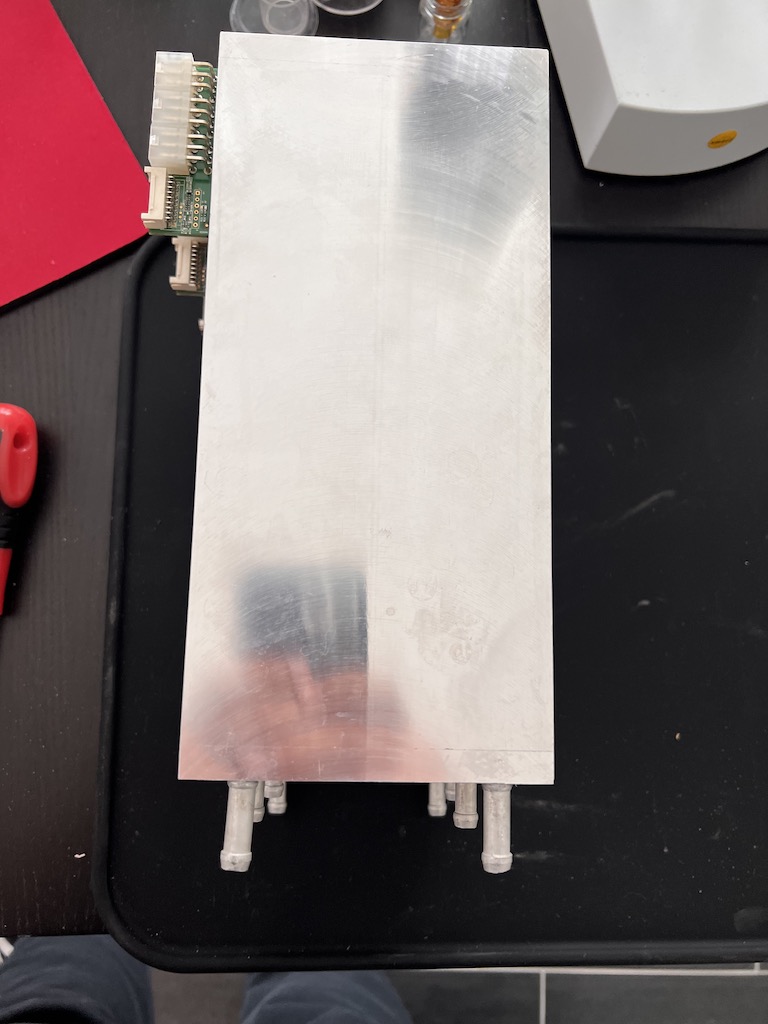
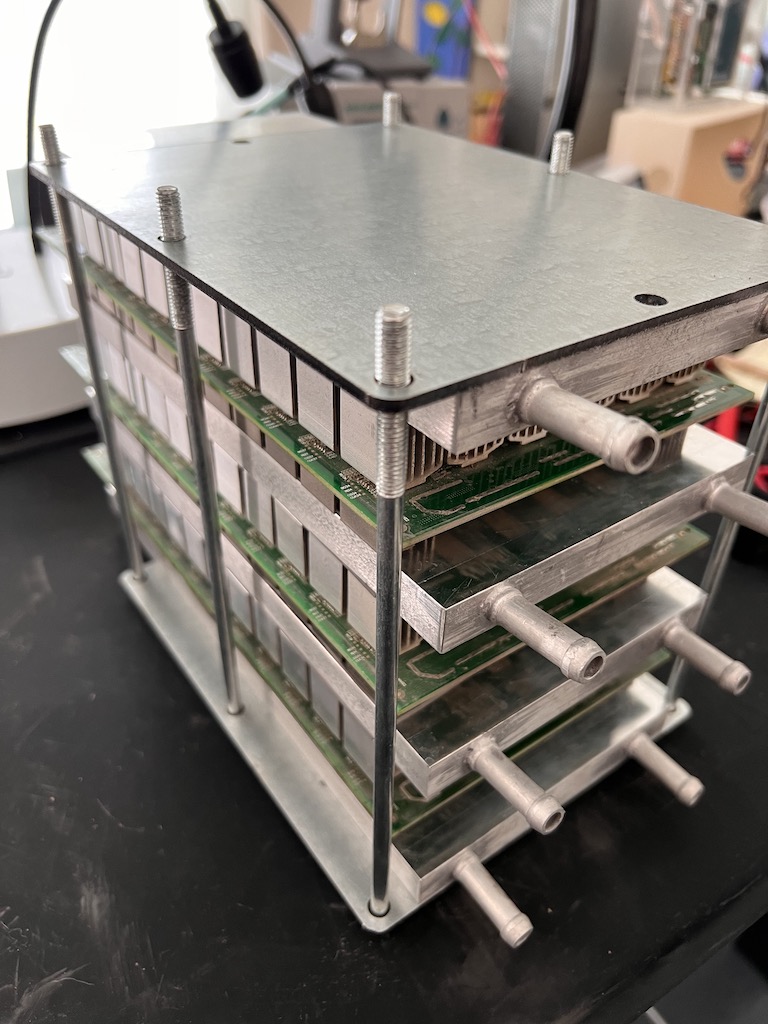
- Insert hashboards and cooling water blocks into the steel construction, consisting of the two steel plates and the six long screws. Make sure that the steel construction does not touch any components of the dashboards.

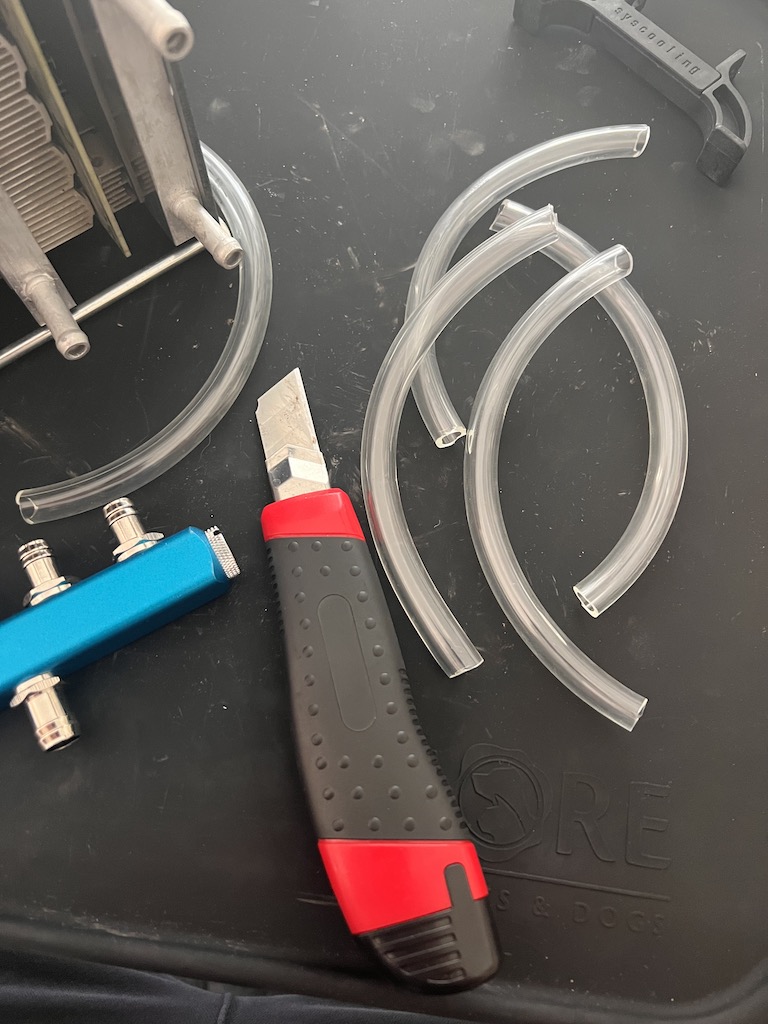
Step 4 – Building the Tubing Structure
Use sensible clamps, clamps and the teflon tape! Decide how far the radiator should be from the miner. However, all components should be as close together as possible. Note the volume your pump can handle at 12 V. You can either cut the hoses by eye or measure them. However, a sharp box cutter will do the trick. Make sure the cuts are clean and straight. In total you need:
- 8 x 40cm thermal hose 10mm A (hashboard to water distributor)
- 1 x 30cm thermal hose 10mm B (distributor to pump)
- 1 x 50cm thermal hose 10mm C (distributor to radiator)
- 1 x 50cm thermal hose 10mm D (radiator to pump)
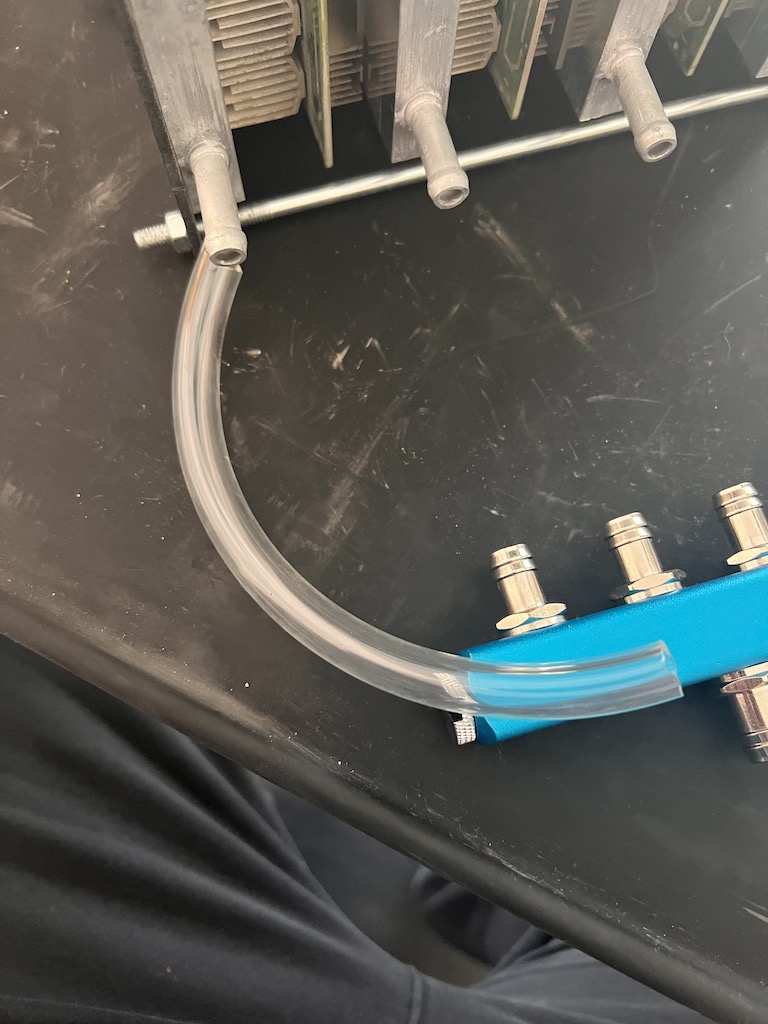
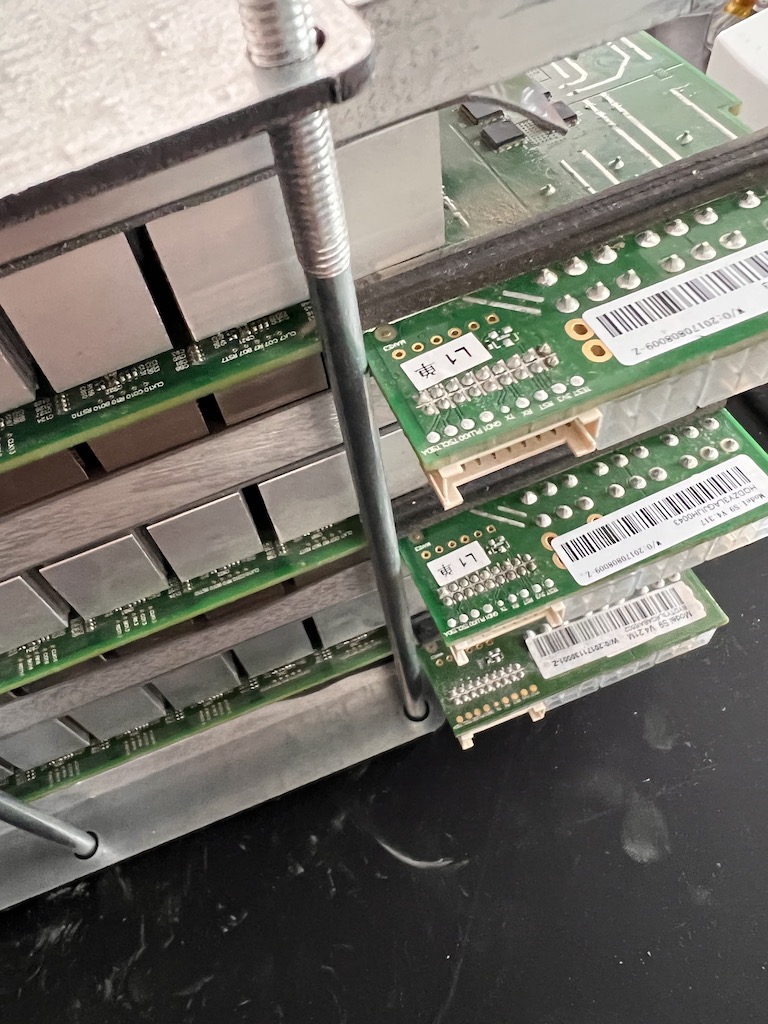
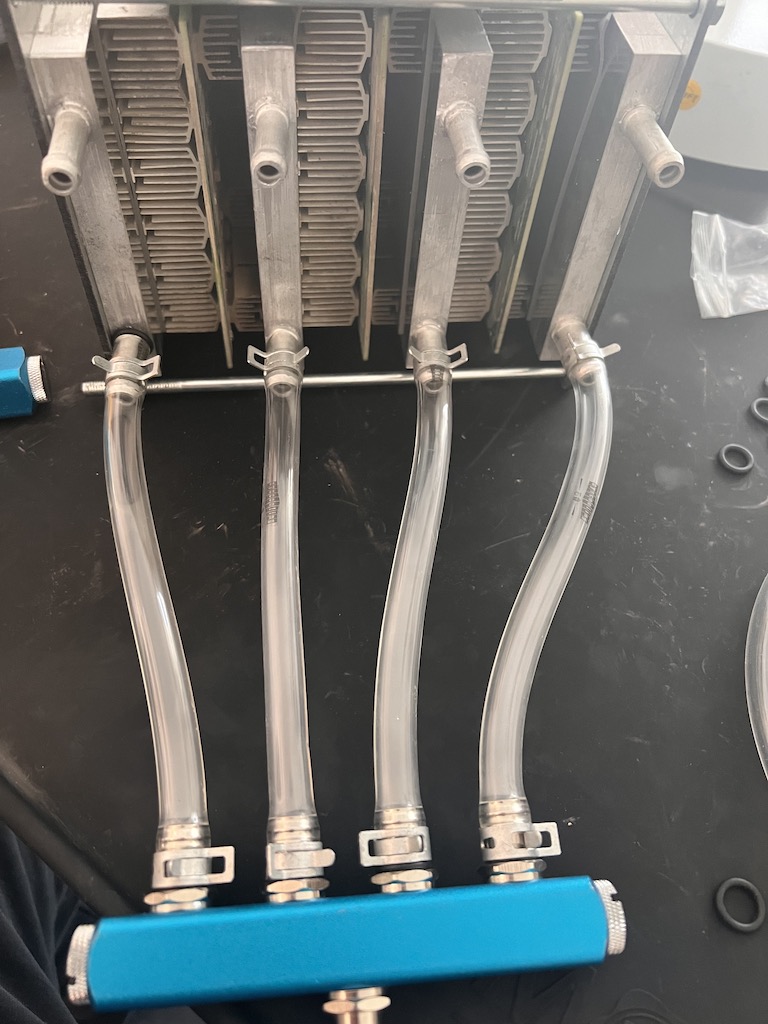
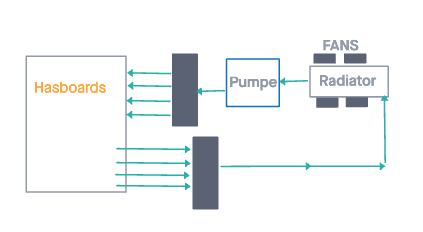
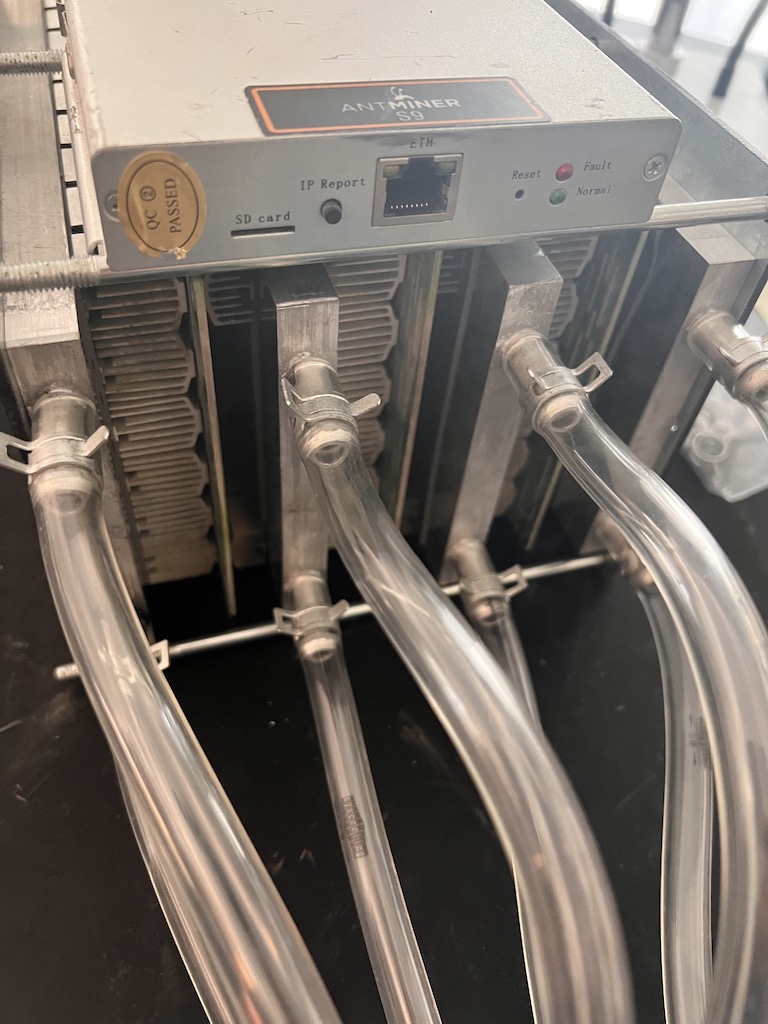
- Connect the hashboards to the two water distributors. Each cooling water block has a water inlet and a water outlet. Determine which side is the inlet and which is the outlet and connect the hoses accordingly to the respective water distributor.
Step 5 – Connect system to radiator
- Now connect one of the water distributors to the radiator.
- Connect the free radiator connection to the pump (IN).
- Connect the last hose to the free water distributor, but do not connect it to the pump yet! You will soon fill the system with coolant via this hose.
- Assemble the pump bracket.
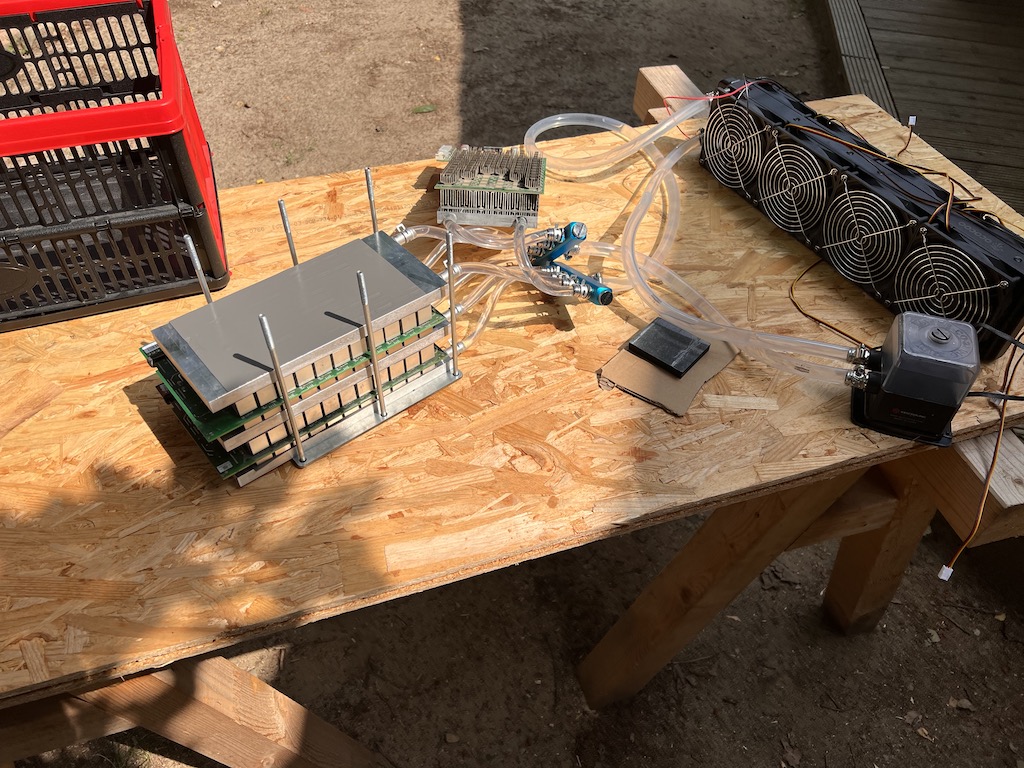
What we have so far

By loading the video, you agree to YouTube’s privacy policy.
Learn more
Step 6 – Power Supply
It is best to use a PC power supply, a new power supply APW3 ++ or replace the fan in the power supply. If the system is still too loud for you, you can place the miner in a suitable sound box – only the radiator has to be exposed to the air.
Risk of death! Alternatively, you can remove the top cover from the power supply and then cool it with a quiet 120 mm fan. Just don’t touch anything.
Step 7 – Test run and fill the system with water
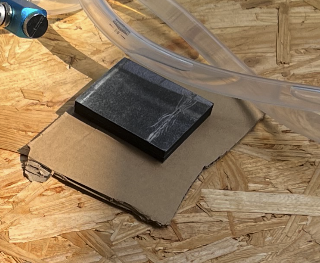
- Place the control board on the bitcoin cube, you need to put something non-conductive and heat resistant under the control board. The underside of the control board must not touch the cube. There is a risk of short circuit!
- Connect the hashboards to the control board. Be careful.
- Fill the system with the coolant via the free hose (water distributor) until it reaches the pump. This can take a while. Then connect the hose to the pump. Position everything so that voltages / power supply / miners cannot come into contact with the cooling liquid. I recommend using High Performance Dielectric Heat Transfer Fluid (oil) – it will ensure that there are no short circuits should a leak occur.
- Connect the water pump to one of the FAN connectors on the control board.
- Connect all FANs with the Fan PWD extension cable and connect the cable to a free FAN connector on the control board.
- Connect the power supply to the hashboards and to the control board.
- Connect the miner to your network (LAN cable).
- Connect the power adapter to an outlet with its own on/off switch and turn it on.
- Check the system with a measuring device for the absence of voltage. If the fuse blows, completely disconnect the system from the power supply!
- You should now be able to see how the system works and how the air is transported into the reservoir. You can then continue to fill the system with coolant through the opening in the expansion tank, which is mounted on the pump, until the system is completely vented. Make sure that the miner does not overheat during the procedure. Interrupt the process if necessary and let the miner cool down.
First launch of the Bitcoin Heater
By loading the video, you agree to YouTube’s privacy policy.
Learn more
Make sure that the system does not lose any coolant. If this is the case, switch off the system via the socket and check the hose connections. Use Teflon tape or something similar for this, the main thing is that the system is and remains dry.
If the miner gets wet, there is a risk of death and a short circuit. Position everything so that it cannot come into contact with the coolant. Even with a system with high-performance dielectric heat transfer fluid (oil), make sure that the oil does not get into the environment!
Step 8 – Install alternative firmware (optional)
You need a Micro SD card with 8 GB or 16 GB. SD cards with more storage space can cause problems.
- Download the image for the SD card: Braiins OS+ or VNISH
- Flash the image onto the SD card with Etcher.
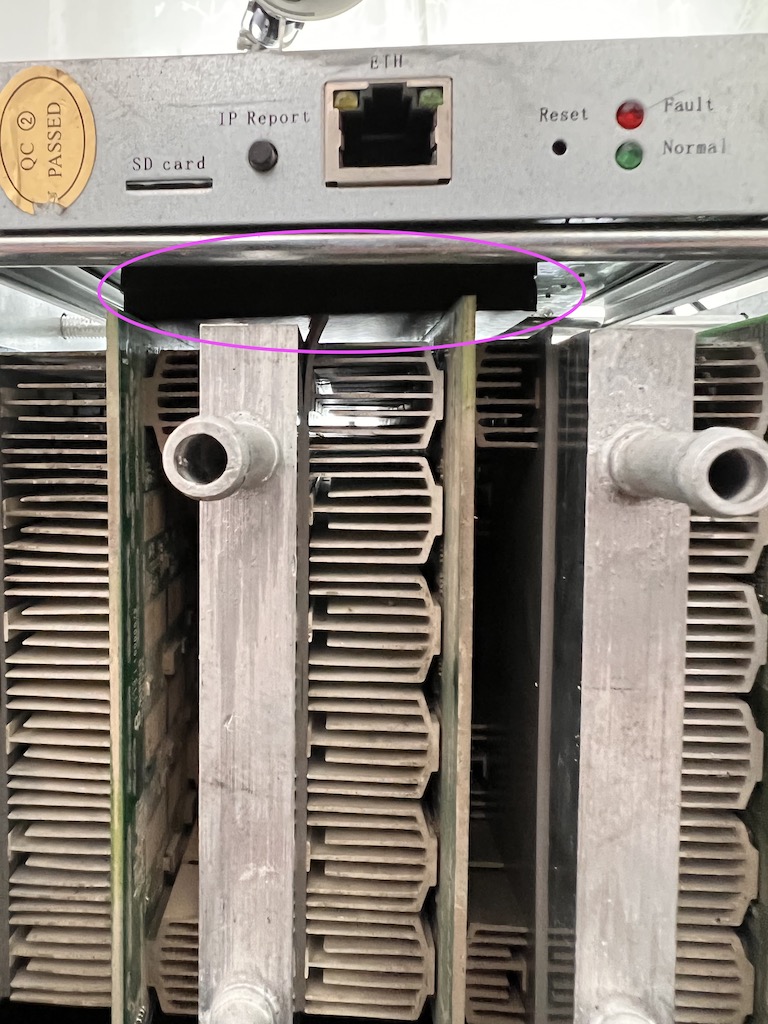
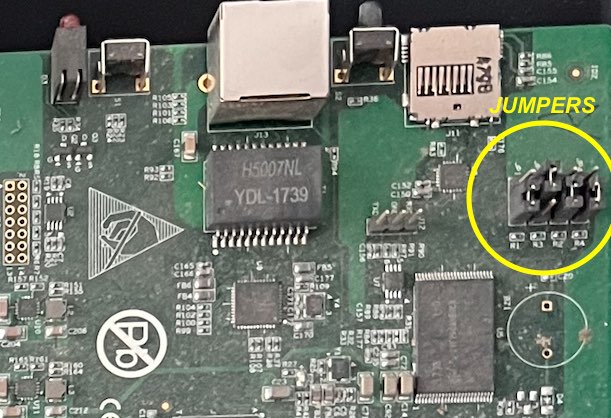
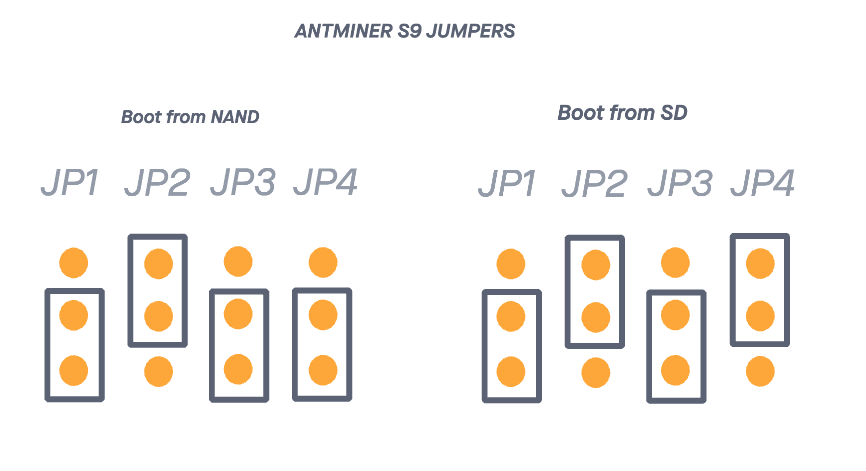
- Adjust the jumper on the control board to boot from the SD card (instead of NAND memory) as shown here:
- Insert the SD card into the Miner (Control Board SD Slot) and boot the system.
- After a few seconds, you should be able to access the miner’s interface using the IP address.
Now all you have to do is set up your pool and your Bitcoin Heater is fully operational.
Support this project
- BTC On-Chain: bc1qflqv2tczn36vys67xn76dzfepyr8teladt5m77
- BTC LN: BTCPay Crowdfund